If you’ve been on a quest for a breakfast that is simultaneously nutritious, delicious, lightning-fast to make, and incredibly versatile, your search ends right here with the perfect Moong Dal Chilla Recipe. More than just a humble lentil pancake, this golden-hued crepe is a powerhouse of plant-based protein, a canvas for your culinary creativity, and a game-changer for busy mornings. Forget the stereotype of bland health food; a well-made chilla is crispy at the edges, soft and savory within, and utterly satisfying. This isn’t just another recipe; it’s an invitation to transform your mornings with a dish that has fueled generations in Indian households. Mastering this Moong Dal Chilla Recipe is your first step towards a sustainable, healthy eating habit that doesn’t compromise on taste.
Why This Moong Dal Chilla Recipe Will Become Your Staple
My own journey with chilla began not in a gourmet kitchen, but in a cramped college dorm. Feeling perpetually sluggish after sugary cereals or greasy takeaways, I craved something wholesome. A call home led me to my grandmother’s simple Moong Dal Chilla Recipe. With just a handful of ingredients soaked overnight and blended, I created my first, admittedly lumpy, chilla. The moment I took a bite of that warm, savory pancake with a cup of tea, I was hooked. The energy lasted for hours. That’s the magic—it’s real food, made from scratch, and it makes you feel incredible.
This guide goes beyond just listing steps. We’ll delve into the why behind each technique, explore endless variations, and provide the secrets to that restaurant-style crispness. We’ll also look at tools that make the process effortless. Whether you’re a seasoned home cook or a complete novice, this Moong Dal Chilla Recipe is designed for success.
The Heart of the Dish: Understanding Your Ingredients
The beauty of this Moong Dal Chilla Recipe lies in its simplicity. Each ingredient plays a crucial role:
-
Moong Dal (Split Yellow Lentils): The star. Using split and skinned moong dal (yellow) is non-negotiable for the right texture and quick cooking. It’s a brilliant source of protein, fiber, and easy-to-digest nutrients. You can find high-quality, organic moong dal easily online. For the best results, I personally use and recommend this Organic Moong Dal which ensures a clean, pure flavor.
-
The Aromatics: Ginger, green chili, and hing (asafoetida) are the flavor trinity. Ginger aids digestion, chili gives a gentle heat, and hing adds a deep, savory umami that is irreplaceable.
-
The Spices: Cumin seeds are essential—they crackle in the pan and infuse the batter with a nutty fragrance. Turmeric adds color and anti-inflammatory properties.
-
The Binders: A little rice flour or chickpea flour (besan) is the secret tip for extra crispness. Onion and fresh coriander not only add freshness but also help bind the chilla.
-
The Medium: A good non-stick or well-seasoned cast-iron pan is your best friend. For perfectly even and effortless chillas, a quality non-stick tawa or crepe pan makes all the difference. I’ve found that using a professional-grade non-stick pan like this one virtually guarantees no-stick results every single time.
The Step-by-Step, Foolproof Moong Dal Chilla Recipe
Prep Time: 8 hours (soaking, mostly inactive) | Cook Time: 15 mins | Makes: 6-7 chillas
Ingredients:
-
1 cup split yellow moong dal (washed & soaked)
-
1/2 inch ginger, chopped
-
1-2 green chilies (adjust to taste)
-
Salt to taste
-
1/4 tsp turmeric powder
-
A generous pinch of hing (asafoetida)
-
1 tbsp rice flour or besan (for crispness)
-
Water, as needed
-
1 tsp cumin seeds
-
1 small onion, finely chopped (optional)
-
Fresh coriander, finely chopped
-
Oil or ghee for cooking
Method:
-
The Soak: Rinse 1 cup of moong dal thoroughly until the water runs clear. Soak it in plenty of water for at least 6-8 hours, or overnight. This softens the dal, making it easier to blend and digest.
-
The Blend: Drain the soaked water completely. In a blender, combine the drained dal, ginger, green chilies, turmeric, hing, and salt. Add about 1/4 cup of fresh water initially. Blend into a smooth, thick, yet flowing batter. It should be like a slightly thick pancake batter—not runny like dosa, not pasty. The rice flour/besan can be added at this stage and blended for a few seconds.
-
The Rest & Season: Pour the batter into a bowl. Whisk in the cumin seeds. Let it rest for 10-15 minutes. Just before cooking, fold in the chopped onions and coriander. If the batter has thickened, adjust with a spoonful or two of water.
-
The Perfect Cook: Heat your pan on medium-high heat. The right temperature is key—a drop of water should sizzle and dance. Lightly drizzle oil and wipe the surface with a paper towel.
-
Take a ladleful of batter and pour it onto the center of the pan.
-
Immediately, using the back of the ladle in a gentle, swift spiral motion, spread the batter outwards into a thin circle. Don’t press hard. This step requires a bit of practice but is crucial for thin chillas.
-
-
The Crisp & Flip: Drizzle about 1/2 tsp of oil or ghee around the edges and a few drops on top. Let it cook for 2-3 minutes until the top looks set and the edges lift easily. You’ll see beautiful golden-brown spots forming underneath.
-
Flip confidently using a thin, wide spatula. A good flexible stainless steel spatula is ideal for getting under the delicate chilla without tearing it.
-
Cook the other side for 1-2 minutes until lightly golden.
-
-
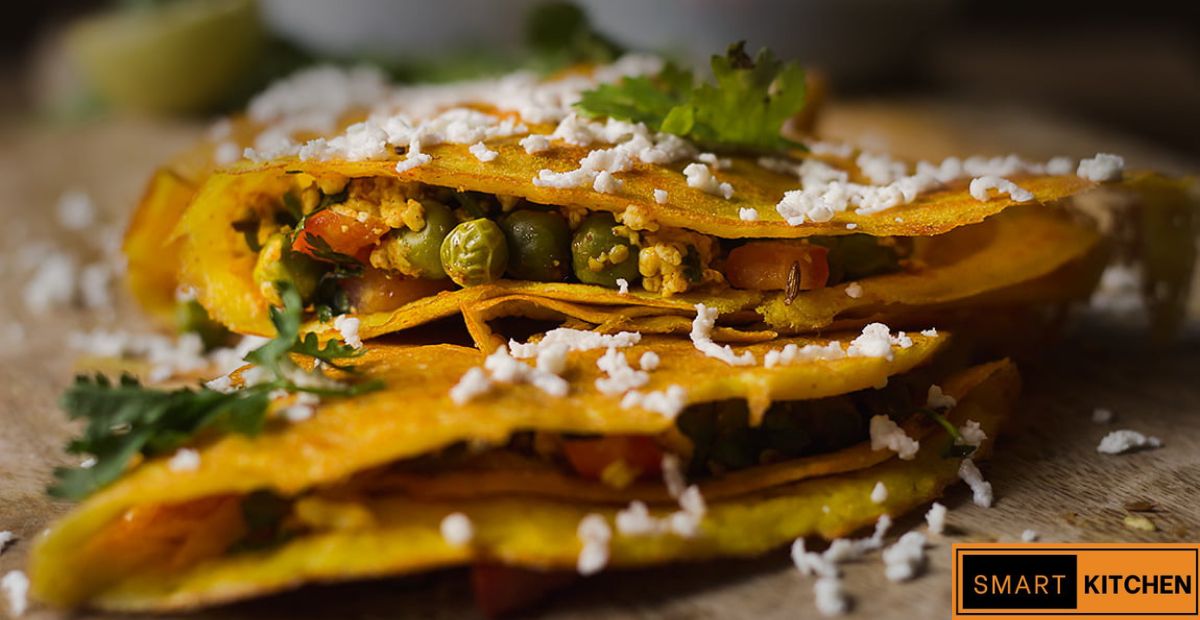
Serve Hot: Serve immediately off the pan! The crispness is at its peak when hot. Pair it with green chutney, a tangy tomato sauce, or a dollop of yogurt.
Beyond the Basic: Endless Customization
This Moong Dal Chilla Recipe is a blueprint. Get creative:
-
Veggie-Packed: Add finely grated carrots, chopped spinach, bell peppers, or corn to the batter.
-
Cheesy Delight: Sprinkle some grated cheddar or paneer after spreading the batter.
-
Masala Twist: Add chaat masala or garam masala to the batter.
-
Herb It Up: Use mint, dill, or parsley along with coriander.
Pros and Cons of Moong Dal Chilla
Pros:
-
Extremely High in Protein & Fiber: Keeps you full for hours, aids metabolism.
-
Naturally Gluten-Free & Vegan: Suitable for diverse dietary needs.
-
Quick to Make: Once the dal is soaked, it’s a 15-minute meal.
-
Incredibly Versatile: Can be adapted with endless fillings and flavors.
-
Easy to Digest: Moong dal is known for being light on the stomach.
-
Cost-Effective: Made from inexpensive, pantry-staple lentils.
Cons:
-
Requires Planning: Needs 6-8 hours of soaking, so it’s not an instant, impulsive meal.
-
Practice for Perfection: Achieving the ideal thin, round shape can take a couple of tries.
-
Tastes Best Fresh: Doesn’t store well for long; is best eaten right off the pan.
Moong Dal Chilla vs. Other Breakfast Options: A Comparison
| Feature | Moong Dal Chilla | Cereal with Milk | Omelette | Oatmeal |
|---|---|---|---|---|
| Protein Content | Very High (Plant-based) | Low to Moderate | High (Animal-based) | Moderate |
| Fiber Content | High | Low (unless high-fiber) | Very Low | High |
| Prep Time (Active) | 15 mins | 2 mins | 10 mins | 10 mins |
| Planning Needed | Yes (Soaking) | No | No | No |
| Satiety Value | Very High | Low | High | High |
| Customization | Extremely High | Low | Moderate | Moderate |
| Sugar Content | Zero (Savory) | Often Very High | Zero | Can be High |
As the table shows, the moong dal chilla recipe stands out for its superior macro-nutrient profile and flexibility, demanding only the minor trade-off of pre-planning.
Read More :- The Ultimate Keto Paratha with Almond Flour : Fluffy, Foolproof & Just 5 Net Carbs!
FAQ Section
Q1: Can I make the Moong Dal Chilla batter without soaking?
A: While you can try a “quick soak” with hot water for an hour, traditional soaking is vital. It removes anti-nutrients, makes the dal easier to blend into a smooth batter, and ensures the chillas are easy to digest. I don’t recommend skipping it.
Q2: My chillas are breaking when I flip them. What am I doing wrong?
A: This is common! Likely culprits: 1) Batter is too thin – add a little rice flour. 2) Pan isn’t hot enough – ensure it sizzles. 3) Flipping too early – wait for the edges to lift and the top to set completely. 4) Using the wrong spatula – a thin, flexible one is key.
Q3: Can I store the leftover batter?
A: Yes! You can store it in an airtight container in the refrigerator for up to 24 hours. It may thicken, so adjust consistency with water before use. For best results, cook fresh.
Q4: Is Moong Dal Chilla good for weight loss?
A: Absolutely. It’s a superstar for weight management. High in protein and fiber, it promotes satiety, controls cravings, and provides sustained energy without empty calories. Just be mindful of the amount of oil/ghee used for cooking.
Q5: What’s the best pan to use for a perfectly non-stick result?
A: A good quality, heavy-bottomed non-stick pan is foolproof for beginners. A well-seasoned cast iron or carbon steel tawa gives excellent crispness but requires more skill. Investing in a top-rated non-stick crepe pan eliminates guesswork and delivers consistent, restaurant-quality results.
Conclusion: Your Kitchen Awaits
This Moong Dal Chilla Recipe is more than instructions; it’s a passport to a healthier, more energized you. The initial step of soaking the dal is a small act of care for your future self. Imagine waking up to the aroma of these golden crepes sizzling on your pan, knowing you’re about to fuel your body with pure, clean energy.
Don’t just read about it—experience it. Gather the simple ingredients, soak your dal tonight, and tomorrow morning, claim 15 minutes for yourself in the kitchen. You deserve a breakfast that truly nourishes. And to make the journey seamless, having the right tools—from the perfect organic dal to the ideal non-stick pan—can elevate this simple recipe into a daily ritual you’ll cherish. Start your chilla journey today; your body will thank you for it.